How To Create Goals In Google Analytics
In this article I will provide a step by step guide to understand how to create a goal to track your conversions or business KPIs in Google Analytics. This is really useful to understand how your business is performing and how you can improve the ROI for your company. In order to create a goal first you need to define what KPI really matters to your business e.g if you are tracking conversions on your website related to banking industry then signing up for a credit card or any financial product is the KPI for you. By considering this as an example I am writing the below steps to track successful signups as a goal. Lets get started.
Step 1: Sign in to your Google Analytics account
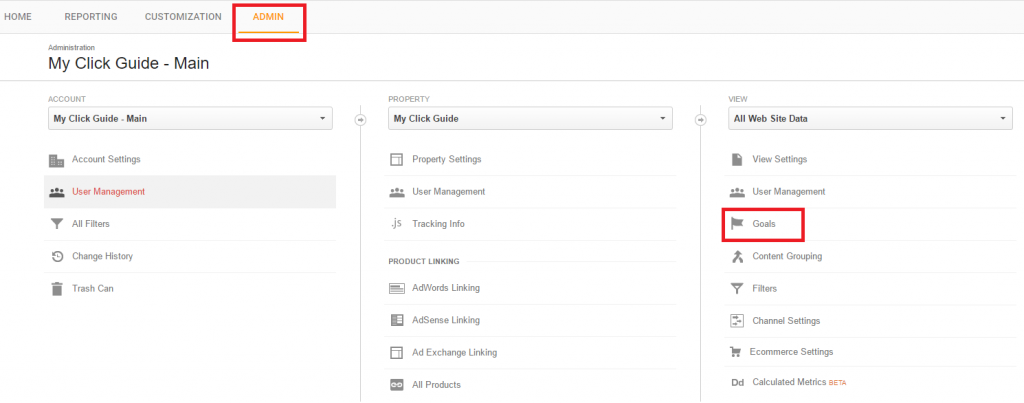
Step 2: Click on the Admin button from the top menu then Click on Goals under the View column as shown below
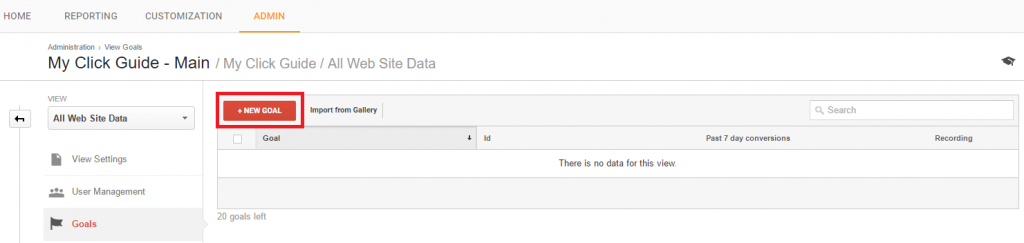
Step 3: Now Click on New Goal button as shown below
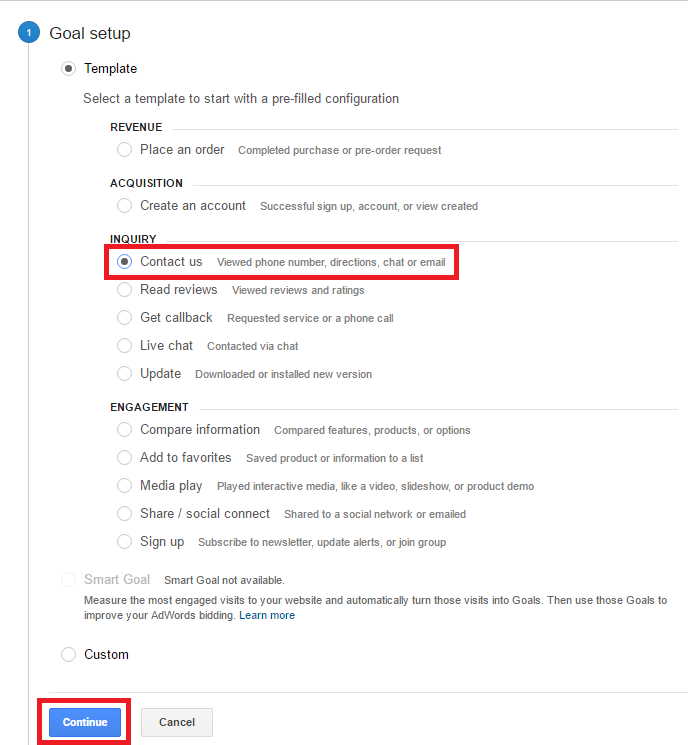
Step 4: On the next screen you will have few built-in goal templates. If any of the templates matches your business needs then select that or you can create your own by selecting Custom option from the Goal Setup. In our scenario we will be selecting Contact us template from the Inquiry option and then click Continue as shown below
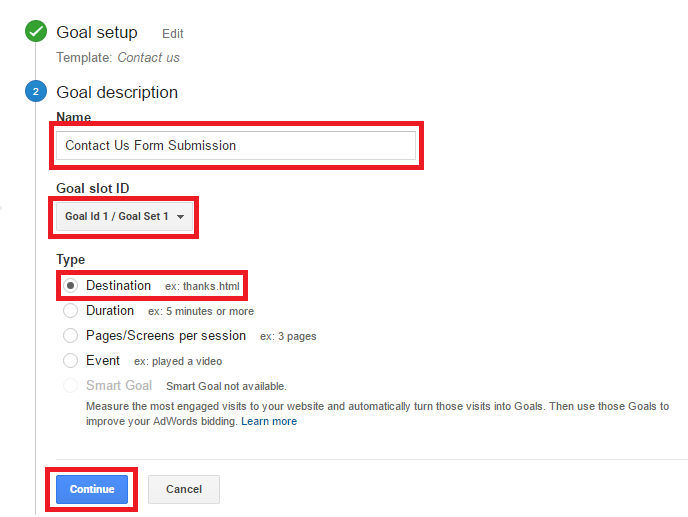
Step 5: Give a relevant name to your goal, then Select the Goal Slot ID as required and then Select the Type of goal as Destination and finally Click on Continue
Step 6: In the next option you need to enter your thankyou page url to measure the successful form submission. If you have only one thank you page then it is easier for you to create a goal by just selecting equal to and adding your thankyou page url but if you have multiple thankyou pages by product then you need to select option Contains and then whatever name your thankyou page contains e.g thankyou.html enter in the text box. In my scenario as I have only one thankyou page hence I will be selecting equals to option, will add my thankyou page url in the text field and then finally will Click on Save button. Have a look at the screenshot below.
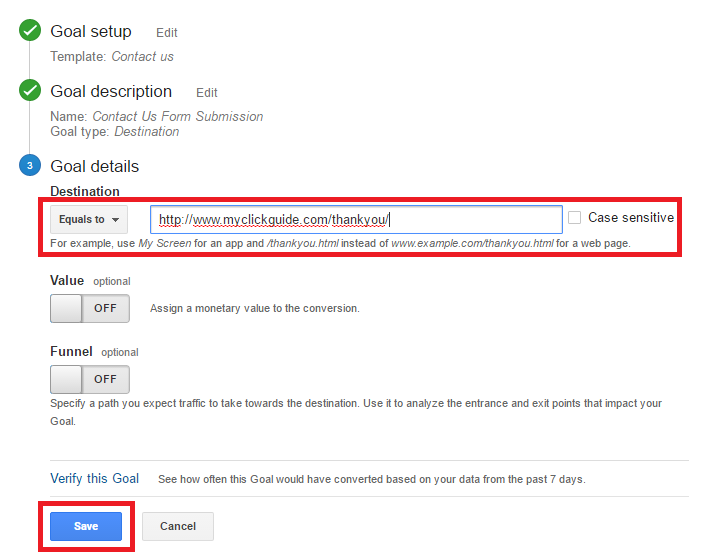
If this goal has any monetary attached then you can define this value by enabling Value option as shown in the above screenshot and also if your goal has multi steps user journey then you can enable funnel option to track whole user journey. I will explain this in another article here. How To Enable Funnel For Google Analytics Goal
Now you can Click on Verify This Goal to see how your conversion rate will look like based on the last 7 day’s historical data. If you don’t have any historical data then give it a few days before it will appear in your dashboard.
That’s it you have created a Goal in Google Analytics. If you have any questions or need help feel free to comment.