How to Install NGINX on cPanel
In this article, we will share how to install the popular NGINX web server software on your VPS or Dedicated Hosting account. Installing NGINX allows your webserver to cache content and increase server performance. This ultimately translates into faster websites and better experiences for end-users. The NGINX installation process requires both root WHM and SSH access and is only recommended for users with familiarity with Command-Line Interfaces (CLI). As this process requires root-level access, it can only be performed on VPS or Dedicated Hosting accounts.
This article will cover:
- Change Listening Ports
- Installing NGINX
Change Listening Ports
STEP 1: Log into WHM as the root user.
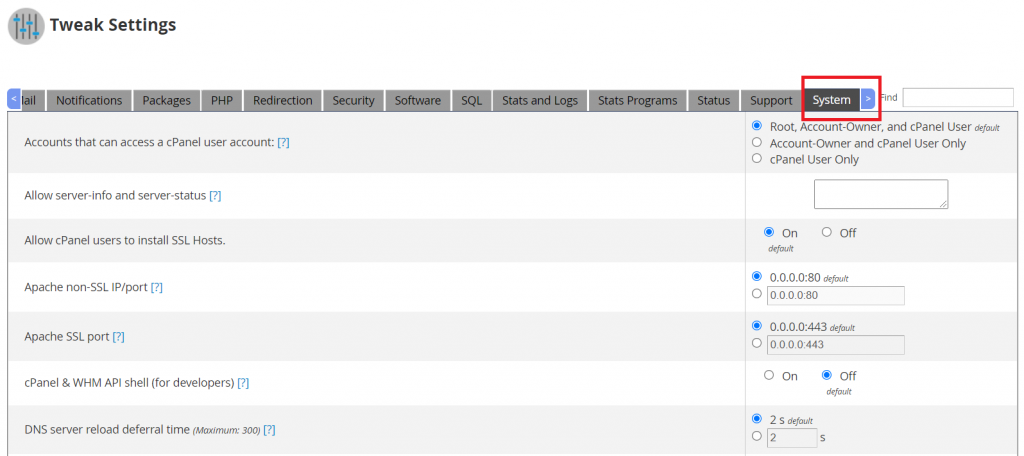
STEP 2: Click the Tweak Settings link in the Server Configuration section.

STEP 3: On the Tweak Settings page click the “>” to scroll, then click the System tab when you see it.
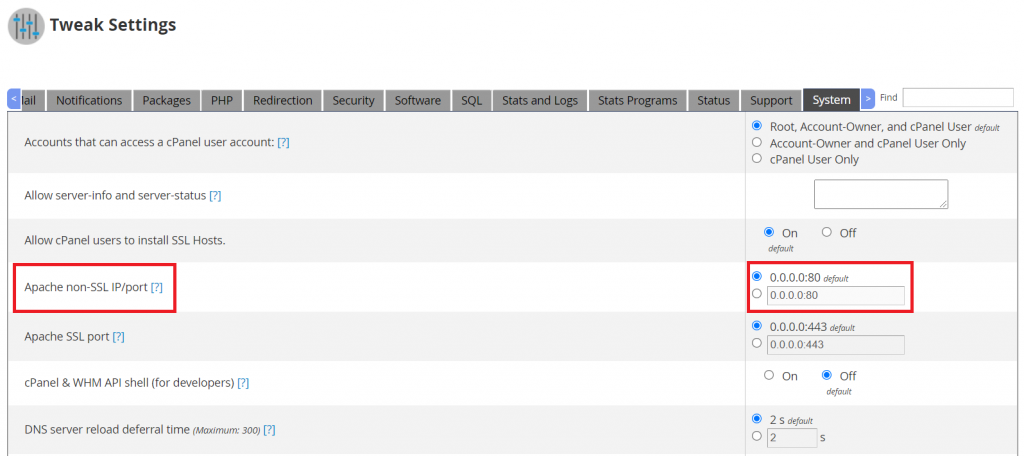
STEP 4: Scroll down to the Apache non-SSL IP/port options and select the box to change ports. Since we want to set the listening ports to 8080 for InMotion servers, enter the following:
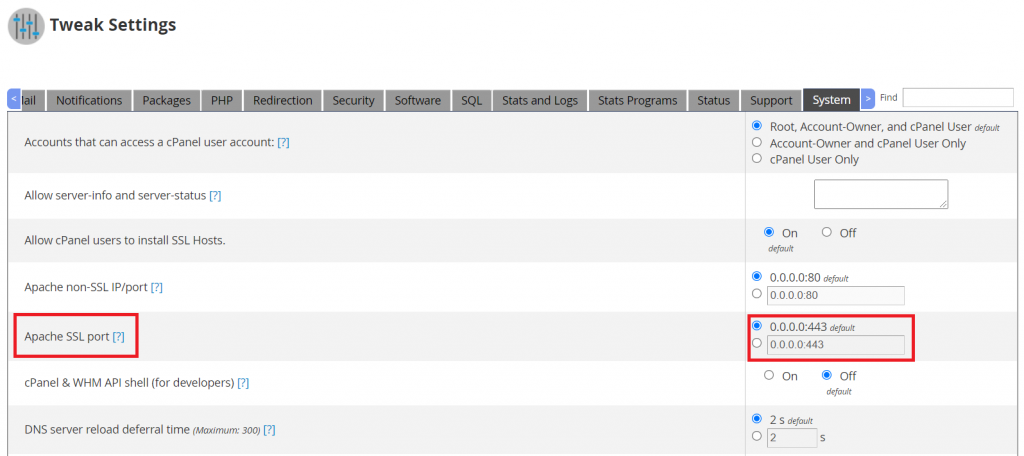
STEP 5: Navigate to the Apache SSL port setting and select the box to change the ports. Since InMotion uses port 8443 enter the following:
STEP 6: Scroll down to the bottom of the page and click the Save button to open the listening ports.

Installing NGINX
STEP 1: Connect to your server as the ‘root‘ user via SSH.
STEP 2: Run the following command to install NGINX:
yum install imh-nginxSTEP 3: You will see the following message, type ‘y‘, then press the enter key.
Install 1 Package
Total download size: 484 k
Installed size: 1.3 M
Is this ok [y/d/N]: y
NGINX has been installed successfully when you see a message such as this:
Installed:
imh-nginx.x86_64 0:1.13.3-2.el7

Complete!
STEP 4: Run the following command to configure NGINX for your server.
yum install imh-ngxconfSTEP 5: You will see the following message, type ‘y‘ then press the enter key.
Install 1 Package
Total download size: 43 k
Installed size: 103 k
Is this ok [y/d/N]: y
NGINX has been configured when you see a message such as this:
Installed: imh-ngxconf.noarch 0:0.9.10-9.el7

Complete!
STEP 6: Congratulations, you have now installed NGINX!
If you need any further assistance, Please contact our support team by create a support ticket here and our support team will answer as soon as possible. For more articles do visit MyClickGuide and increase your knowledge.